Note
Please try a new analog watch face from ReedWorks: RW Gold !
Contents
- Description
- Custom settings
- Premium features
- AMOLED devices
- Default look
- Themes
- Shadow
- Anti aliased mode
- Hour mark styles
- Minute/second marks
- Hands options
- Extra hand
- Analog seconds hand
- Status icons
- Optional data
- Subdials configuration
- Weather
- Barometer
- Date format
- Setting up alternate time zone
- Side gauges
- Digital box
- Power save modes
- Battery use
- Double gesture
- Flies
Introduction
This manual is meant to give general idea of available configuration options and how they work. The pictures shown may not correspond exactly to the current look of the face.
The availability of particular features depends on the watch model. If you don’t find some options described here in your settings, it means these options are not supported on your watch.
Description
An analog face with customization options for the content and for the look. It has some unique features such as the ability to store customized layouts and color themes, flexible date format or optional ‘dynamic’ hands that reveal the information hidden underneath on wrist movement.
The customization is accessible through the watch face settings. The settings can be changed in Garmin Connect IQ app on a mobile device or Garmin Express app on a computer. The latter option is far less convenient and not recommended except in emergency when Connect IQ has a problem.
There are several different hour marks and hand styles to choose from and ways to configure the display to anything ranging from a very minimalist clean look to a more complex face with four data fields, two side gauges and a ‘digital box’ that can alter its content on wrist gesture.
Besides showing the current time, this watch face provides options to show:
1) Configurable status icons
2) 4 Option data fields
3) 2 Side gauges
4) Digital Box (DBox)
5) Extra hand (12/24h Alternate or UTC time)
The data font size is adjustable, so that the optional data fields can be easier to read in poor light conditions or without glasses.
Custom Settings
To change the settings, follow these instructions: https://forums.garmin.com/developer/connect-iq/w/wiki/14/changing-your-app-settings-in-garmin-express-gcm-ciq-mobile-store
Premium features
Depending on the watch model, some of the available features may require an unlock key. These options are marked by a star icon ⭐ in the settings.
Note that there are two ways of marking the premium options in drop down lists:
-if changing the option is not possible without the key, the icon is shown next to the list title,
-if only some of the options can be selected from the list, the icon is shown next to each option that requires the key.
If you select any option that requires a key, but you don’t have a valid key, after 1 week trial period a floating padlock icon will appear on the screen several seconds after the watch enters ‘high power mode’. Otherwise all premium features remain fully functional.
For instructions how to obtain the unlock key, please refer to this page: https://reed.works/time-flies-unlock/
When you receive the key, you need to enter it in the settings in the ‘Unlock key’ field, and press ‘Save’ button. Then the ‘Key status’ field will be updated to show the status and optionally the expiry date of your key. Please note that for the key status to be updated, a good connection between your watch, your phone and the internet is required. Sometimes it may take some time for the key status to be updated, and if you are sure that your key is correct, you might try to restart the Connect App on your phone – this has been reported to help in some difficult cases.
FOR AMOLED DEVICES: After entering the key and saving the settings, you may need to ‘wake up’ the watch from its ‘sleep’ state (show the full watch face) for the key to be validated.
IMPORTANT: The 12-digit unlock key is created for a 6-digit token that is unique to your watch. So, if you enter incorrect 6-digit token on the unlock page, you will receive an incorrect key that will not work. Please be careful and make sure you enter the correct token!
AMOLED devices
By default, Time Flies will operate in full screen mode if Always On Display is active on your watch. This mode adheres to Garmin’s guidelines for AMOLED displays, but this does not guarantee that your screen will not experience burn-in after some time. To reduce the impact, you can use the Time Flies ‘power save’ options which reduce the displayed features, with the ‘screen saver’ option being the safest bet.
The colors in the AOD mode depend on your current theme. If the theme uses background, DBox background other than black, or texture / pattern, all screen elements will be displayed in white. Otherwise they will be shown in the theme colors.
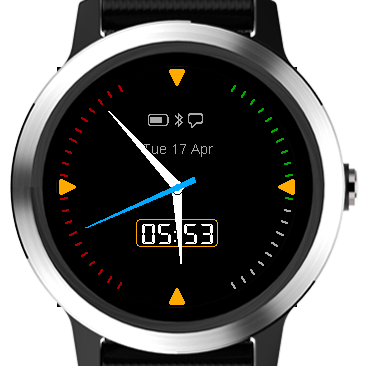
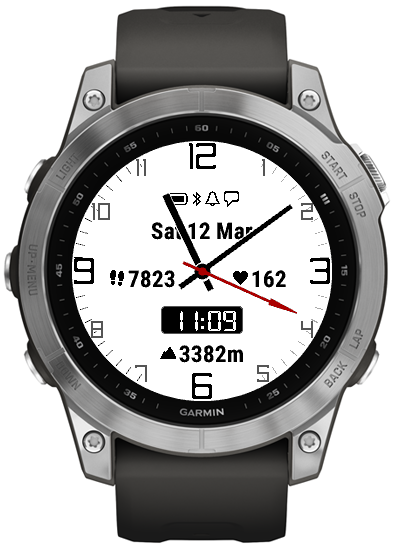
Default look
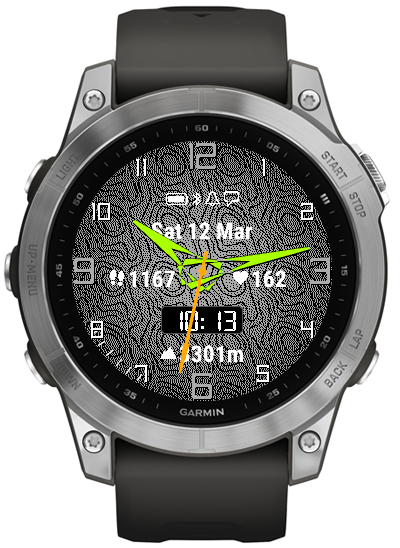
After the initial installation the face looks similar to this:
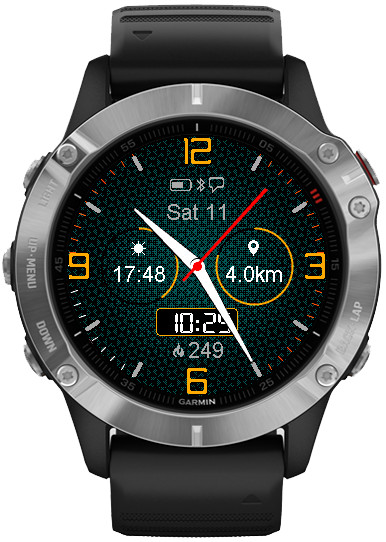
NOTE: If you update from an earlier version, it may look different. To bring the default look, use ‘reset layout’ and ‘reset theme’ options in the settings.
Layouts and themes
The appearance can be changed quickly with customizable layouts that define things like marks, gauges, hands, data, DBox of the face and themes that define the colors of the screen elements and the background wallpaper design.
It is recommended that you first try what the pre-defined layouts and themes look like and then adjust them to your liking. The changes you make will be kept until you decide to reset the layout or the theme.
NOTE: The customization applies to the layout or theme currently displayed on your watch, and not necessarily the one currently shown in the settings. So, if let’s say you change the theme from A to B, and you want to modify theme B, press “SAVE” first to activate theme B on the watch, only then edit the settings again to change the colors. Otherwise, all your changes will apply to theme A instead. This also means that if you try to do this with Garmin Express, you will need to disconnect the watch from the computer after changing the theme first if you intend to modify the theme you just switched to.
The modifications are stored with each layout / theme, so that later you can quickly switch between your customized configurations. The layouts and themes can be switched directly on the watch using the ‘Customize’ function, if it is supported by your device.
If you want to restore the original/factory layout or theme, select the relevant ‘Reset’ and save the settings.
The choice of colors includes a set of 14 base colors (8 on Forerunner 55) identified in the settings by color names, and additional 4 ‘custom colors’ (not available on Forerunner 55) identified by color numbers that can be set to values ranging from 0 (black) to 63 (white):

This color map is a rough guide and the colors that appear on your watch might not exactly match the colors shown above.
NOTE: On the devices with MIP display, the colors may appear dim if there is little ambient light or when the backlight level is low.
Besides the colors, it is also possible to choose different background textures and patterns for each theme.
NOTE: Textures and patterns are not displayed on some devices unless ‘Anti alias’ option is activated. They are also not displayed in AOD mode on AMOLED devices.
Shadow
Shadow allows to create a bit of a 3D effect or to improve the readability of screen elements that do not use contrasting colors. Shadow depth can be adjusted to five different levels, ranging from ‘Off’ to ‘XL’. Shadow is added to hour/minute marks, hour/minute hands and DBox frame. On DBox frame it only appears when shadow level is set above M.

Anti aliased mode
Time Flies always uses anti aliased drawing if supported by the device.
However, on fenix 6, 6X and Approach S62 the anti alias is controlled manually in the settings, and if it is enabled, the second hand will only show on gesture. Also, the texture will show only when anti alias is on.
Hour mark styles
There are several different hour marks styles that can be chosen independently for major marks (3, 6, 9, 12) and minor marks. You can create many different combinations, for example:


Major marks come in two sizes:

Numeric marks style allows different fonts:


Minute/second marks
The important point to understand is that these marks as seen after the initial installation actually represent left and right data gauges. By default, the left gauge shows daily steps goal completion, and the right gauge is the move bar. That’s why the marks might change color with time. For detailed explanation of how this works, please check the Side gauges topic below.
Hands options
Shape
There are several hand shapes available:


Size
The base size ratio between the hour and the minute hand is fixed, but the size of both hands together can be adjusted with independent length and width S/M/L options:


Style
You can choose ‘Solid’, ‘Outline’ or ‘Dynamic’.
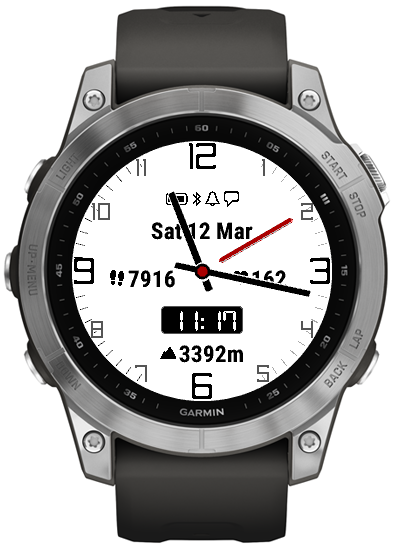
Dynamic watch hands
This is an innovative feature meant to help reveal the information that might occasionally get obscured by the hands.
If you choose ‘Dynamic’ hand style, wrist gesture will cause the hands to switch from ‘Solid’ to ‘Outline’ for a few seconds, which should allow you to read the information underneath.


Extra hand
If enabled, this extra hand uses ‘Outline’ style if the main hands are ‘Solid’, or ‘Outline’ with a different color when the main hands are shown as ‘Outline’ too.
It can be configured to show Alternate time (with the zone defined in ‘Alt time UTC offset field’), or UTC/Zulu time, in 12 or 24 hour mode.
Analog seconds
Analog seconds behavior depends on the device. On newer MIP devices from fenix 7 onwards they are always on unless set to ‘Off’. On older MIP devices they only show for about 10 seconds on gesture, with the exception of the ‘Dot’ shape which is shown continuously. On AMOLED devices, seconds do not show in AOD.
Analog sec shape
- Off (seconds hand disabled)
- Dot
- Straight
- Arrow
- Wand
- Wedge
- Finger
- Pointer


Analog sec size
- S
- M
- L
- XL
Status icons
Status icons placement depends on Opt1. If Opt1 ‘subdial weight’ is zero, the icons will appear in line above Opt1. Otherwise they will be placed at the corners of the screen, only the first 4 enabled in ‘Icons selection’ will be shown, and the numbers for battery level and notification will be hidden.
These icons are possible:
- battery level
Its presence is controlled by the ‘Battery icon hidden above charge level’ setting (see below).
- phone connection (Bluetooth)
Shows when the phone is connected.
- alarms
Shows when one or more clock alarms are set in the watch.
- do not disturb
This icon is only available on watches supporting Connect IQ 2.x and it shows when the watch is in ‘do not disturb’ mode.
- notifications
Shows when there is one or more active notifications on the phone. To activate/deactivate different types of notifications, please refer to the ‘Smart notifications’ setting in Garmin Connect Mobile app.
Icons Selection
You can decide which icons you want to be shown by placing the following letters in the ‘Icons selection’ setting. The order in which you type the letters in the text box does not matter – the icons will appear in the same fixed order.
B – battery icon with numeric charge level shown in %
b – battery icon without the number
p – phone connected (Bluetooth icon)
d – do not disturb
a – alarm(s) set
n – notifications
N – notifications with a number of pending notifications
Battery icon hidden above charge level (%)
If you set it to 100% (which is the default), the icon will be visible always.
If you set it to 0%, it will always be hidden.
If you set it to any number in between, for instance 25%, the icon will appear when the battery drops below 25%.
Status icons activation
This is a setting to switch the icons on/off, or to display it only when not in power save mode.
Optional data
There are 4 optional data fields that, depending on the watch, can show:
- Battery %
- Alternate zone time
- UTC time
- Date
- Distance
- Calories
- Active calories
- Steps
- Day intensity minutes
- Week intensity minutes
- Floors
- SpO2
- Stress
- Body battery
- Respiration
- Time to recovery
- VO2 Max (running + cycling)
- Wrist HR
- Altitude
- Next sunrise/sunset
- Moon age (days since last new moon)
- Barometer with trend
- Weather (conditions and temperature)
- Temperature range
- Wind (direction and speed)
- Humidity
- Precipitation chance
- Weather observation time
Data font size
The font size in the optional fields can be adjusted. The choice ranges from ‘XS’ to ‘XL’.
If the font of your choice makes the data too large to fit in its allowed space, the font size will be automatically reduced as much as possible. Unfortunately, on some devices with unreasonably large fonts (e.g. Venu SQ 2) the capability to fit the data in its designated space may be limited.


Option data update frequency
By default, option fields 1 to 4 are refreshed once a minute, but if you enable ‘Fast updates on gesture’, they will be updated as fast as possible for about 10 seconds after you move your wrist.
Subdials configuration
Data fields Opt1 – Opt4 can be shown in two ways, either as a straight line, or a circular field with configurable appearance and data level/progress arc growing clockwise from 12 o’clock position.
This is controlled by the settings parameter ‘Subdial weight’. This setting consists of four numbers corresponding to Opt1 – Opt4 respectively, ranging from 0 to 9.
Zero means the circle is off. Any number above zero defines the width of the circle rim.
When a given Opt field outline is greater than zero, there are some additional settings taken into account:
* Subdial background
-Transparent
-Color (‘Sub bg’ color will be used to fill the circle)
-Shade (like Transparent but with shading)
-Color + shade (like Color but with shading)
* Subdial colors
You can choose the background, foreground, rim background and rim foreground colors to follow the element colors of the main dial.
NOTE: On fenix 6 / 6X / Approach 62 the shading is only available when anti alias is on.
Weather
On watch models supporting Connect IQ 3.2 or higher, it is possible to choose weather info for the optional fields. The weather data is provided by Garmin.
Currently the available options include:
– weather icon with temperature
– wind direction icon with wind speed (m/s, kph, mph, knots, BFT)
– relative humidity
– temperature range
– precipitation chance
– weather observation time
If you are not sure what Connect IQ version your watch is running, you can find out by going to the watch settings menu, then ‘System’ and ‘About’.
Barometer
Barometer option shows the mean sea level barometric pressure. If the readings appear incorrect, please use the calibration function of the watch.
In addition to the current reading, the barometer also tracks the pressure trend over the period defined with the ‘Baro trend minutes’ setting, up to 1440 minutes which corresponds to 24 hours. The trend is marked by the changing barometer arrow icon.
Side gauges
The gauges serve a dual purpose: They display the level of the selected data and they can double as minute/second marks.
The available data includes (depending on the device):
– daily steps progress
– move bar
– battery level
– floor goal completion
– active/intensity minutes goal completion (day)
– active/intensity minutes goal completion (week)
– total calories goal completion (the goal has to be entered in the settings)
– active calories goal completion (the goal is computed automatically)
The automatic calculation of the active calories goal is based on the entered total calories goal and the Basal Metabolic Rate derived from the Garmin User Profile (age, gender, weight).
The size can be adjusted from S to L:


There is also a ‘Dots’ option:

And a ‘Hash’ option:

If you choose ‘Dots’ or ‘Hash’ style, the size setting will apply to the diameter of the dots or to the width of the hashes.
Tip: If you don’t care about the gauges, but just want minute/second marks, you can set the gauges to ‘Marks’. You can also hide the gauges by setting them to ‘Off’.
There is an option to choose between the “Classic” gauge type from 1 to 5 and 7 to 11 hours, or the “Full” gauge type from 0 to 6 and 6 to 12 hours.

Date format
The date format is defined by a sequence of characters, each denoting one component of the date (day, month, week, year etc). It may require some effort to understand how it works, but it allows you to make it almost any way you like. To customize the date, enter a string of characters up to 16 in length, with this coding:
D = day number with leading zero
d = day number without leading zero
M = month number with leading zero
m = month number without leading zero
Y = 4-digit year
y = 2-digit year
N = month name
n = day name
C = month name in ALL CAPS
c = day name in ALL CAPS
w = ISO week number
a = am / pm
| = whatever comes after this symbol will appear at the top of date circle / subdial
= = escape character, causes the next one to be taken literally
Any other character (e.g. – / : . ) will be displayed if it is available in the current character set. So you can decide the information you want, the order and the separating characters. Note that a space / blank is also considered a character in this case, so you can add spaces to separate the components.
For example, you can use the following formats:
“n D N” → Fri 24 Aug
“n D.M” → Fri 24.08
“d/m =ww” → 24/8 w34
“YMD” → 20180824
“m-d-y” → 8-24-18
“G=ar=mi=n” → Garmin
Setting up alternate time zone
For alternate time, you can set the UTC offset from -14 to +14 hours. The offset is a fractional number, so that half hour offsets can be taken care of as well. For example for India (UTC+5:30) enter 5.5. For UTC just enter 0.
NOTE: Garmin Express and Connect IQ apps sometimes have problems with accepting special character input (for example minus ‘-‘ or decimal point ‘.’). To get around this problem, you can try to:
-start from the default value “-5.0” and edit it as you need, without deleting the characters that you want to keep, or
-use another app to write the offset, then copy and paste into the Garmin app.
Digital Box
You can turn it on/off, place it at the bottom or at the right side of the screen, and choose to display different things in it:
Off

Time

Here you have 3 choices – local time, alternate time or UTC time. For the alternate time, you can set the UTC offset from -12 to +12 hours. The offset is a fractional number, so that half hour offsets can be taken care of as well. For example for India (UTC+5:30) enter 5.5.
Date

The date displayed in the DBox shares the same format setting with the date option field. However, the date in DBox will always show in English regardless of the system language setting. Also, please note that if the length of the date text according to the defined format exceeds the width of the DBox, “–” will be shown instead. If this happens, shorten your date format. For example, you could use D.M format to show 15.08 or m-d to show 8-15 on the fifteenth of August.
sENSOR Filled graph

SENSOR Line graph

Sensor graph options depend on the watch.
Steps goal completion bar graph

Steps goal completion line graph

data
- time
- alt time
- UTC time
- seconds (only Alt DBox)
- notifications counter
- steps
- SpO2
- wrist HR
- body battery
- stress
Alternate DBox
There is an option to select alternate content for the digital box. If this is set to anything other than ‘Off’, the digital box will display the alternate content for about 10 seconds on wrist gesture. This feature could be useful for example to switch between the local and alternate time zones.
It also comes handy if you prefer a clean look without any distractions and only show some additional info on wrist movement. In this case, set DBox to ‘Off’ and Alt DBox to something you only want to see when you move your wrist.
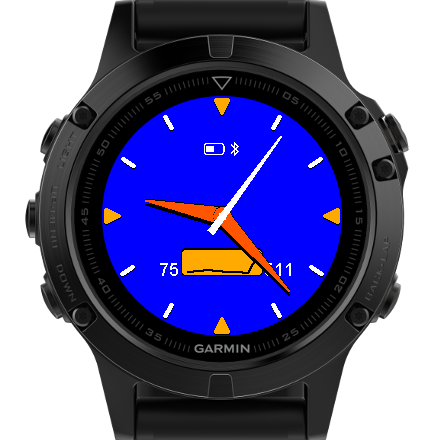
Graph labels
For the HR graph it is simple – the number on the left/bottom side of the graph is the minimum and the number on the right/top is the maximum.
For the steps goal completion graph, this might need some more explanation: this is a graph that shows the percentage of your steps goal completion for the past 7 days and today. So, the horizontal axis has 8 points, one for each day, ordered from left to right chronologically. The numbers on the left and right side of the graph correspond to the lowest and highest value over these 8 days respectively. So for example, if you see 30 and 175 as in the picture above, this means that the lowest point on the graph is the day when you completed only 30% of your steps goal, and the highest point is the day when you completed 175% of the goal.
In addition, the steps goal completion graph shows a horizontal line corresponding to 100% goal completion, so that you can easily see on which days you were above or below the goal.
Power save options
There are several options that control power saving behavior of this watch face. ‘Power save activation’ decides when power saving modes should be active (‘Off’, ‘On’, ‘Night’ and ‘On DND’). ‘Power save display’ allows to choose how much data is shown. Note that the activation / deactivation of the status icons while in power save is controlled separately by the ‘Status icons’ setting.
back to top
Battery use
Battery use depends on the features configured.
On MIP devices, the single biggest battery killer is probably the always on analog second hand, so if you are concerned about the battery drain, either switch to ‘Dots’ analog seconds or disable them altogether.
On AMOLED, if you use AOD, anything else this watch face does will be rather insignificant in comparison to the power drawn by the screen.
Besides that, in general the more complex display configuration you choose in the settings, the more battery it will drain.
On MIP devices, activating Time Flies power save mode for the night can help a lot. AMOLED devices take care of it automatically in the system.
Double gesture
Time Flies uses wrist gesture to temporarily change the display. The gesture activated features include dynamic hands, alternate DBox, fast HR updates, and now also the transition to full display in some power save modes. The problem with activation by gesture is that sometimes it happens when you don’t really want it. The double gesture feature is an attempt to address this problem. When it is activated, if you move your wrist once, deliberately or not, Time Flies will not react. Only if you repeat the gesture within the adjustable ‘Double gesture time’ (expressed in milliseconds), it will switch from the regular display to the gesture activated display. The gesture time setting allows you to control the activation of the gesture enabled features. If you make it shorter, it will reduce the unintentional switches, but it may also make it harder to make it switch. You may play with this parameter to see what works for your watch and your natural wrist movement. The recommended way is to start with a longer time (e.g. 3000ms) and gradually reduce it down to a point beyond which it does not work reliably any more.
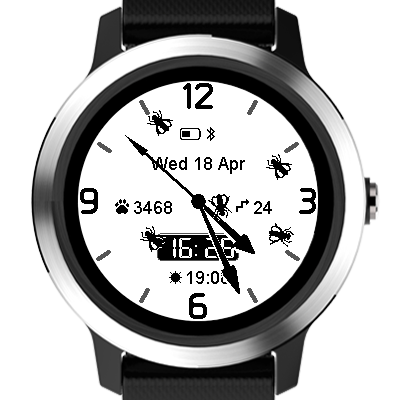
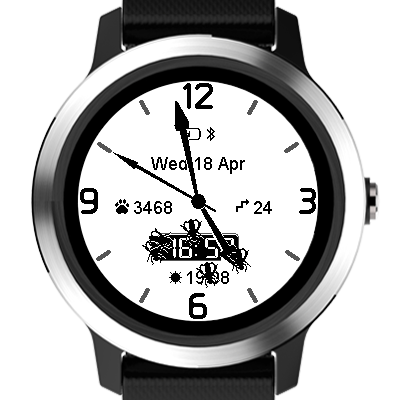
Flies
“Time flies like an arrow, fruit flies like a banana” – This is intended to be a fun alternative or addition to the usual move bar.
When enabled in the settings, the flies start coming after 1 hour of inactivity, one more every 15 minutes (1 fly = 1 move bar increment).
You can chase them off for about 10 seconds by moving your wrist.
To get rid of them for one hour, you need to start walking. It seems that the longer you have been inactive, the more walking it takes to clear the move bar and the flies. Please note that the detection of the inactivity and the clearing of the move bar/flies is handled by the watch firmware, the watch face just reads the information from the system about the current inactivity level ranging from 0 (active) to 5 (inactive for 2 hours or more).